Knowing When to Remove Chicks from the Incubator

The anticipation of waiting for your chicks to hatch after weeks of incubating their eggs can be both exciting and nerve-wracking. Understanding the optimal time to remove chicks from the incubator is crucial to ensure their health and well-being. In this blog post, we will discuss the key indicators and signs that will help you determine the perfect time to take your chicks out of the incubator. Let's dive in and discover the optimal timing for this critical moment!
Consider the Incubation Period

The incubation period for chicken eggs typically ranges from 21 to 23 days, depending on the breed. It is crucial to give the
chicks enough time in the controlled environment of the incubator to develop fully. It can result in health issues if you remove chicks from the incubator too early.
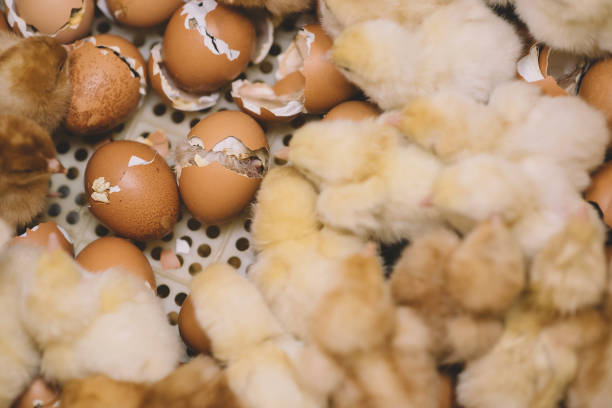
Observe Hatching Progress
The hatching process itself provides important clues about when the chicks are ready to be removed from the incubator. Consider the following indicators:

Pipping
Pipping is the first sign that a chick is ready to hatch. It refers to the initial crack or hole the chick makes in the eggshell using its egg tooth. Once a chick has pipped, it has started breaking through the shell and is on its way to hatching. At this stage, it's essential not to interfere with the process and allow the chick to continue hatching independently.
Zipping and Hatching
After pipping, the chick will proceed to zip, which is the process of creating a circular crack around the eggshell. Zipping allows the chick to weaken the shell and slowly work its way out. Once a chick has fully zipped and pushed through the shell, it will begin to hatch. It is best to wait until the chick has fully hatched before removing it from the incubator.
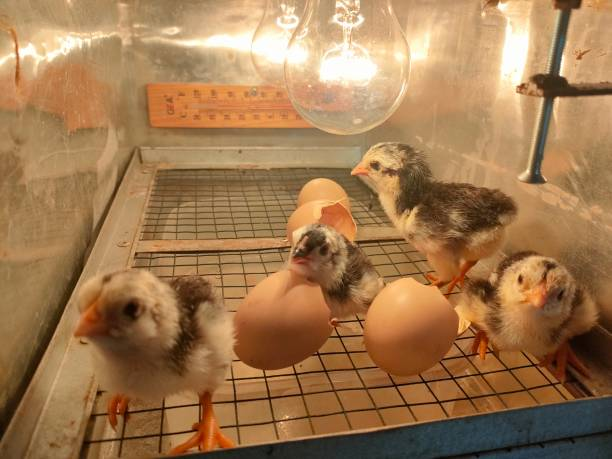
Consider Optimal Drying Time

Once a chick has fully hatched, it is vital to give it enough time to dry and fluff up its feathers before moving it to a brooder or other suitable enclosure. This process usually takes around 12 to 24 hours. During this time, the chick absorbs any remaining nutrients from the yolk sac, and its downy feathers dry and become fluffy.
It's crucial to resist the temptation to remove chicks from the incubator too early, as their feathers may not be adequately dried, making them susceptible to cold temperatures and potential health issues. Patience is key during this crucial drying period.
Assess Overall Health and Strength
Before removing chicks from the incubator, it's important to ensure they are healthy, active, and strong enough to navigate their new environment. Consider the following factors:
Vitality: Healthy chicks exhibit energy and vitality. They actively move around the incubator, peep, and interact with their surroundings.
Leg Strength: Observe the chicks' ability to walk and stand steadily on their legs. Weak or wobbly-legged chicks may require additional time in the incubator to strengthen their muscles.
Dried and Fluffed Feathers: The chicks should have fully dried and fluffed feathers, indicating that they are capable of regulating their body temperature and staying warm outside the incubator.
Absorbed Yolk Sac: A fully absorbed yolk sac indicates that the chick has received the necessary nutrients from the egg and is ready to be moved to a suitable brooding area.

Preparation for Brooding
Once you have determined that the chicks are ready to leave the incubator, it's important to have a suitable brooder area prepared for their transition. The brooder should provide a warm, safe, and draft-free environment with access to fresh water and starter feed.
Ensure that the brooder's temperature is set to the appropriate level for the chicks' age, usually around 95°F (35°C) for the first week, gradually decreasing by a few degrees each week. This will help the chicks adjust to their new environment successfully.
Here is the best heat plate for chicks, the Chickcozy brooder heating plate, it has three specific height designs, as your chicks grow, you can adjust the height of the heater panel by choosing the next adjustment holes.
and multiple tilt angles. You can use the tilt option, so the front of the heater is taller and leans toward the back. The baby chicks will stay toward the front or back, depending on the level of warmth desired.
Unlike the heat lamp, the brooder heating plate won't light up the brooder, it has a hidden indicator, to avoid disturbing the chick's routine. Natural mom hens-like warmth.
Final
Knowing when to take chicks out of the incubator is a crucial aspect of the hatching process. By observing the hatching progress, allowing proper drying time, assessing their overall health and strength, and ensuring a suitable brooding environment, you can ensure a smooth transition for your newly hatched chicks.
Remember, each chick may have slightly different hatching timelines and requirements, so it's essential to pay close attention to their individual progress. By providing the optimal timing and conditions for their transition from the incubator to the brooder, you set the stage for a healthy and thriving flock. Happy hatching!
Leave a comment
All comments are moderated before being published.
This site is protected by hCaptcha and the hCaptcha Privacy Policy and Terms of Service apply.